Key Takeaways
- Learning how to winterize a vacant house is an important skill to learn if you wish to protect your plumbing from freezing temperatures.
- If you’re preparing to sell your home this winter, knowing how to winterize and de-winterize your property can play an important role in passing home inspections.
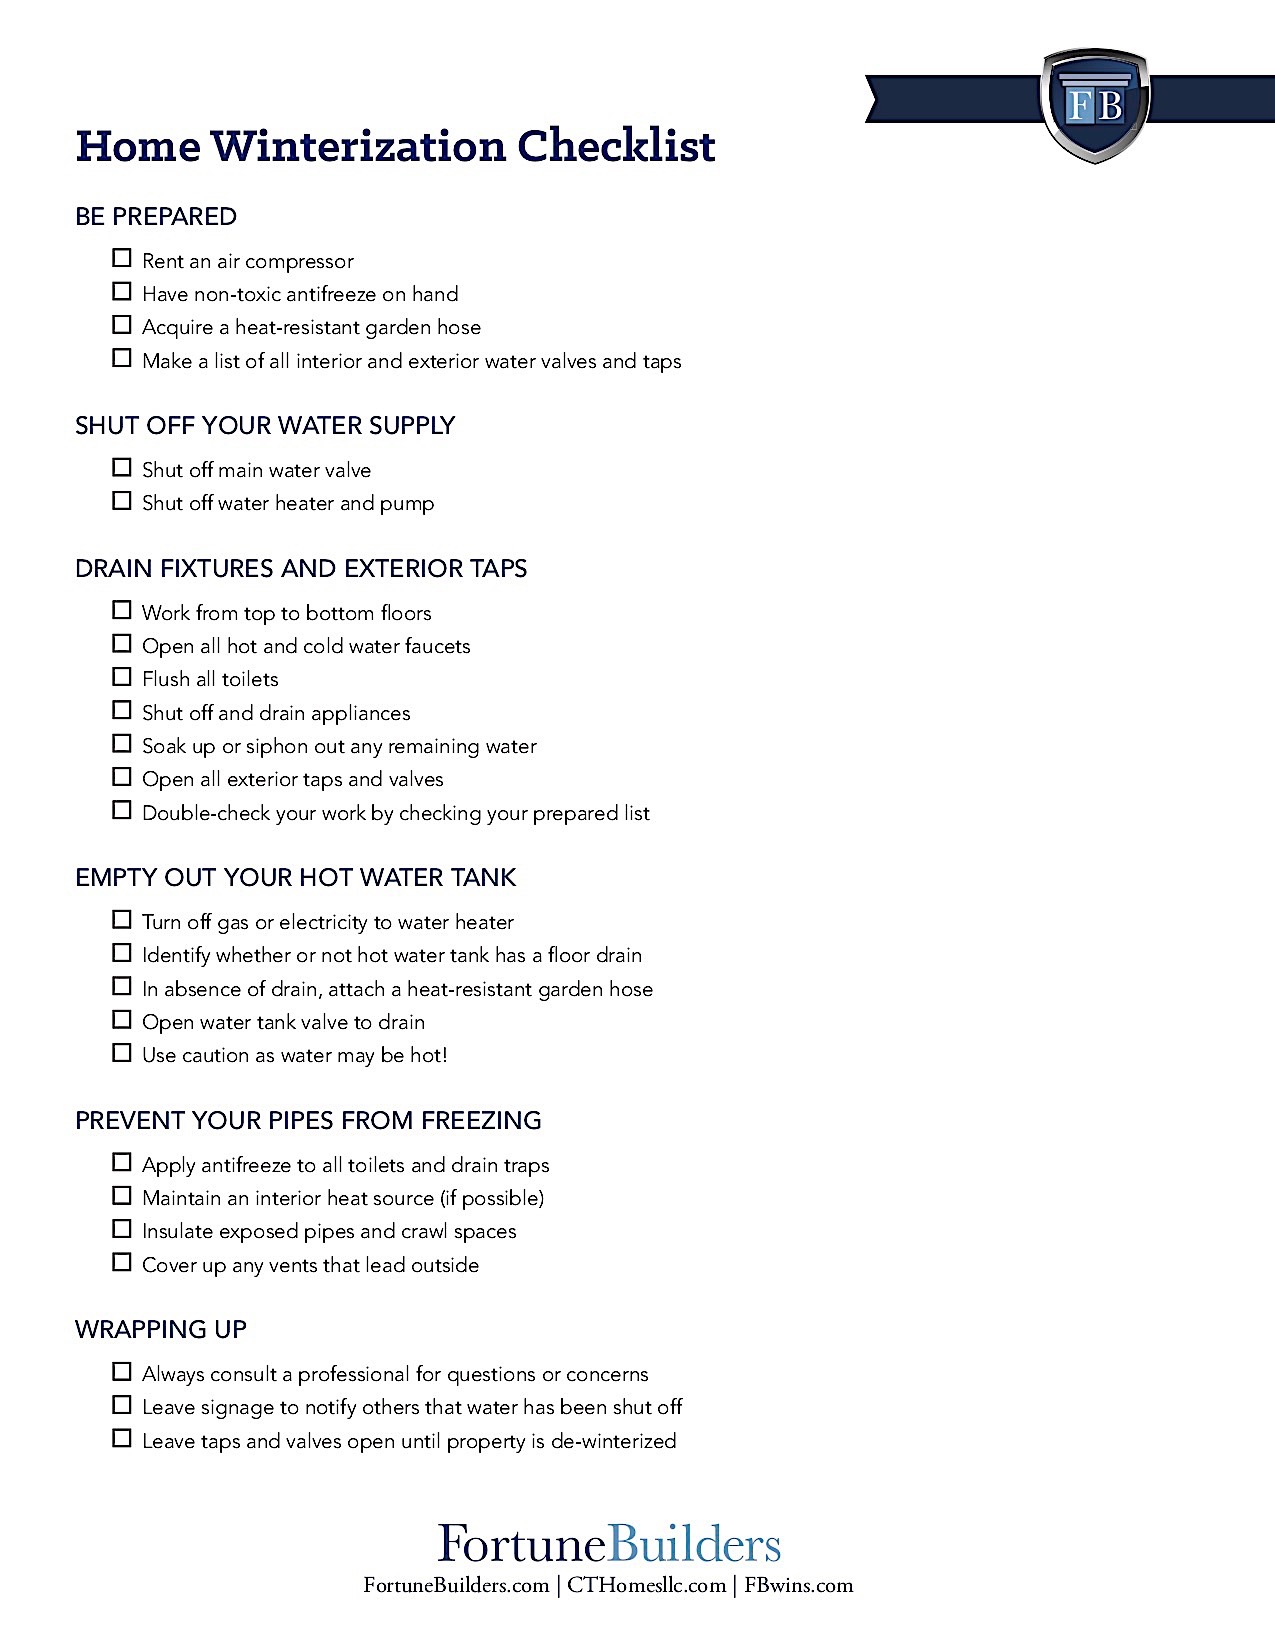
- Make sure you’ve covered all your bases by using the “winterizing a home” checklist provided below.
If you own property that will be vacant for an extended amount of time this winter, knowing how to winterize a house is crucial to protecting your investment. Depending on your property’s location, freezing temperatures can cause your pipes to burst, as water turns to ice. The resulting damage could cost you thousands of dollars in repairs. The sections below provide an overview of the process, detailing what should be done around the exterior and interior of a property. It’s easy to miss a step, so be sure to download the checklist provided below if you plan to do it yourself.
Winterize Your Home: Exterior
The process of winterizing involves completely draining the water out of your plumbing and applying antifreeze to your fixtures. Before you get started, make sure to have an air compressor and antifreeze solution on hand.
The following explains the five steps you should follow to ensure your home is properly prepared for winter:
-
Shut off your water supply: The very first step requires shutting off your water supply to prevent new supplies of water from coming in. Do this by shutting off your main water valve, as well as your water heater and pump. It’s also recommended to turn off the gas or electricity to your boiler or heater.
-
Open all exterior drain valves and taps: Next, open up all drain valves and taps to flush out your water system. A closed tap could cause some water retention, so be sure to double-check your work. These valves and taps should be left open until you’re ready to de-winterize the property.
-
Empty out your hot water tank: Empty your hot water tank by opening the drain valve. Use caution during this step, as the water will still be hot. Before you get started, make special note of whether or not your tank has a floor drain. If it doesn’t, you’ll need to attach a heat-resistant hose and allow the water to drain outside.
-
Blow out excess water: Once you are certain that most of the water has been drained out of the interior and exterior plumbing of your property, use an air compressor to blow any remaining water out of your pipes and irrigation systems. Note that you’ll have to circle back to this step after you’ve drained water from your interior fixtures as well (to be explained in the section below).
-
Prevent freezing pipes: You can take extra precautions to prevent the freezing of any vulnerable pipes with proper insulation. First, audit the exterior of your property to identify any visible cracks that should be sealed with caulking or foam. This will prevent cold air from entering your house and potentially freezing pipes. Then, thoroughly cover exposed pipes and hose bibs with insulation sleeves.
[ Thinking of flipping a house? Avoid these 10 deadly mistakes ]
Winterize Your Home: Interior
Once you’ve made sure that your main water supply is turned off, you are free to decide whether you want to drain your interior or exterior faucets first. Regardless of the order, make sure that your plumbing system has been drained thoroughly before you run an air compressor.
Finally, you will want to complete the next steps to winterize your property’s interior as well:
-
Open all interior faucets: Go through each room and open up all hot and cold water faucets, including all tubs, showers and sinks. If the property has multiple stories, use gravity to your advantage by starting on the top floor.
-
Flush out toilets: As you work your way down, be sure to remove as much water as you can from each toilet. Flush each toilet, and soak up any remaining water as best you can with rags.
-
Drain interior appliances: Shut off and drain any appliances that use water, such as dishwashers, laundry washers, refrigerators and water filters. It may be necessary to siphon out any water that remains.
-
Apply antifreeze: Prepare your antifreeze as directed, and pour the solution into each drain trap, including sinks, tubs and toilets. Pouring the solution slowly can help push existing water into drain pipes. After you pour antifreeze into toilet tanks, flush the tank to flush any remaining water from the bowl.
-
Prevent freezing pipes: If possible, maintain a heat source inside the property to protect your pipes against extreme temperatures. You will also need to properly insulate crawl spaces, where plumbing is often exposed. Also, identify any vents that lead outside, and cover them up using wood or cardboard.
[Downloadable] Winterizing A Home Checklist
Summary
Knowing how to winterize a house is an essential part of preparing your property for winter if you have any planned vacancies. Conversely, if you plan to buy a home in winter, it’s helpful to know that some properties may be winterized, in which case you’d need to have reversed when ordering a home inspection. If you feel that the process lands outside of your skill level, it is well worth it to hire a professional to winterize and de-winterize your property for you.
Do you have any recommended steps that you’d like to see included in our winterizing a home checklist? Feel free to share below:

